The Best Part of Me Opinion Writing

Today I will be writing about a pretty popular writing activity based on the awesome book The Best Part of Me. It is a great mentor text for poetry, opinion writing, or even descriptive writing! I decided to use it with my ELL’s to introduce Opinion Writing and I wanted to show you some things you could incorporate into your lesson.


IMG_0060

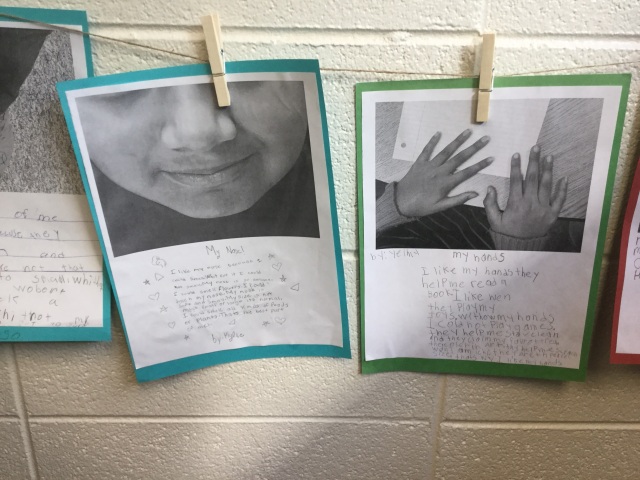
The way the book is set up is each page has a black and white image of a student’s body part and then a poem/descriptive paragraph on the page next to it describing why it is the best part of them. It is written by students for students!

I started the week with just reading some poems to them before sending them back to class and asking them to think about what the best part of them was.

Then, after a few days of exposing them to the text and discussing it I did a Writers Workshop mini – lesson on opinion writing. You could see the mini-lesson statement below.

IMG_0059

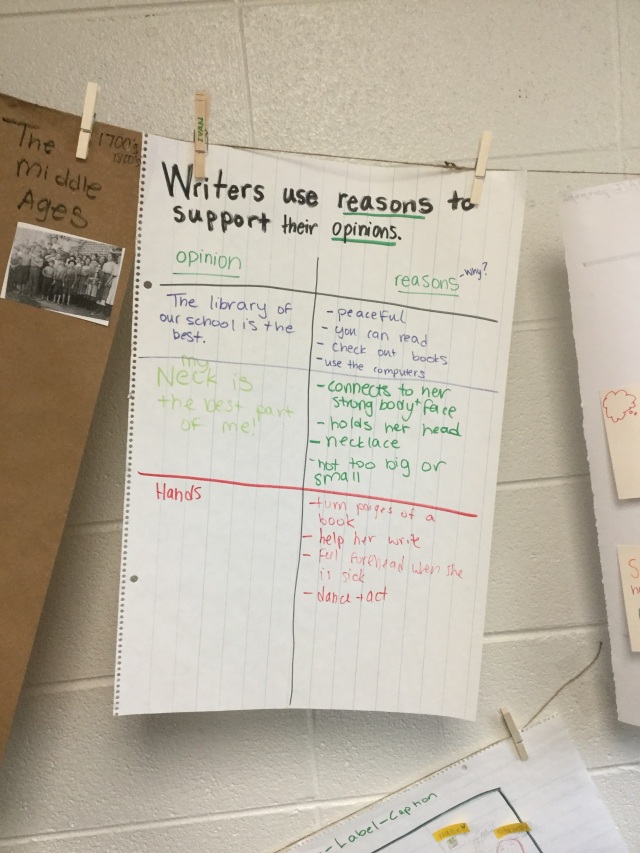
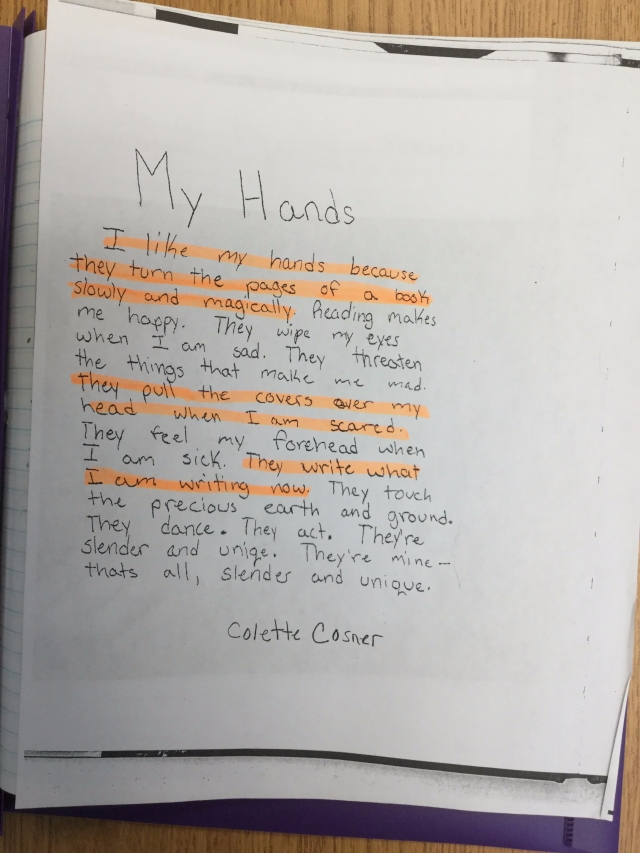
As a small group, we read one the neck poem and then identified the opinion, which was easy, since it was just the writer’s favorite body part. Then, we looked for the reasons they used to support their opinion. After modeling, the students received the poem about the hands and they had to highlight the reasons they could find. I added the reasons they found to the anchor chart. This is a great time to go over some academic language that usually signals opinion (because, due to this, for this reason..)

IMG_0062

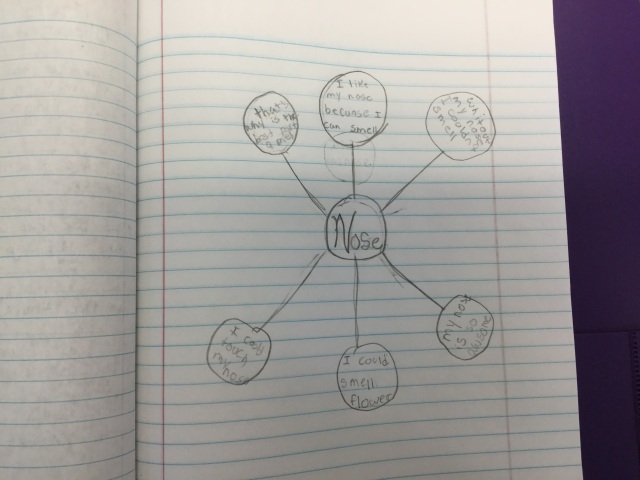
After this, they made a web with their favorite body part in the middle and started brainstorming their reasons. Once they had all their reasons, they wrote their rough draft while I took pictures of the part they identified. Once I printed the pictures, they wrote their final copy under it! I love how it turned out, the students enjoyed it, and it was a great first exposure to opinion writing and reasons/evidence in a student-friendly way!

IMG_0061

Thanks for reading! Let me know if you have read this book and used it for a writing lesson 🙂

Labeling in the ELL classroom

Labeling has become my best friend this year in my groups. It is such a simple thing but I know it is an effective strategy for all ELL’s. Today, I am going to give you some ideas of how you can use labeling with newcomers as well as students who are level 3 -4’s. I use Jen Jones products for these labeling activities. It is easy to find your own but I like it all in one product from TPT.

Newcomers

IMG_0045

As my newcomers come in, I have the picture of the day on the board.  They get their folders and they have their own packet where they have the image. They start labeling it with whatever words they may know. Sometimes they may know just the colors and body parts, since that is what we are working on, and that is OKAY! Then, we brainstorm together and I introduce new vocabulary to them, like grass, rocks, trees, etc.

The labels then become our word bank and we write a caption for the picture. For now, they start with the sentence starter, “I see…”  and they try their best to form a sentence using the words from the word bank. I listen to their formation, and then respond with the correct formation and write it down. They copy down this caption under their own! As the year goes on, we will add more labels to the pictures such as adjectives, verbs, and different sentence starters for the caption!

I love these activities because they build the student’s Tier 1 vocabularies, provide opportunities for writing, provide background knowledge, and even incorporate some informational text features (caption, labels).

More Proficient Students

IMG_0043IMG_0044

With my more proficient 4th graders, I use Picture of the Day from Jen Jones as well. The concept is similar but it incorporates some reading strategies. The students also come in and label the image but then we make observations and inferences based on the image. You can see some of the examples that they came up with with our first picture. I like this activity because it allows the students time to interact. I have them turn and talk to a partner about the observations and then also about the inferences. After we share them, they pick one each to write down in their notebooks!


Let me know if you love labeling and using images as much as I do! Thanks for reading 🙂


Non-Fiction Text Structures + Features Review

Today, I am sharing an activity I did the last school year with one of my ELL groups. These five girls were students between a level 4-5 on the WIDA scale. They have great social language but struggle with academic writing and vocabulary. Their classroom teacher was going over Text Structures (Compare and Contrast, Problem Solution, Cause and Effect, etc.) I wanted a fun activity to go over text structures as well as help the girls write some solid paragraphs. I, of course, went to Pinterest and found an awesome idea. I adapted it a little bit and this is what we came up with: awesome magazines!

IMG_20170508_105326

In science, the girls were studying weather and natural disasters so I decided each girl would pick a natural disaster to study and write 5 mini articles based on the text structures. Before hand, I found a bunch of appropriate articles and books they could use to do their research. Once they finished reading the articles, I allowed them to look for a video to find information from. I created a simple graphic organizer with some guiding questions and each day (I had them for around 20 minutes) we would review one text structure and research information about the natural disaster.

IMG_20170508_120912

Some examples of the articles

I wanted the girls to also review non- fiction text features ( glossary, captions, subtitles) so I required them to add some text features into their magazines. They really enjoyed the activity and were excited to have their own magazine at the end! I will definitely do this next year as well.

IMG_20170508_103857

Multiple choice quiz and the glossary on the back!

Thank you for reading! Let me know if you would do this or ever have.